Cure Ear Ringing With 7 Invigorating Yoga Poses
Yoga has many known benefits. People of all ages and stages have noticed improvements in…
- Strength
- Flexibility
- Posture
- Bone density
- Blood flow
- Focus
- Relaxation
- Balance
- Sleep
These health benefits are significant to improving tinnitus because with improved blood circulation, reduced stress, and improved sleep, symptoms such as ringing in the ears improve as well.
Specific yoga poses can improve ear ringing because they open up the shoulders and the neck which support the head. Certain yoga positions also get the blood flowing by inversion or turning the head upside down. It is important to truly trial these poses by practicing them daily.
Hold each pose for as long as possible. Of course, as a beginner, you may only be able to hold the poses for 5 seconds. Try to increase the time you hold each pose each time you practice.
Here are 7 yoga poses that can reduce or remedy the ringing sounds in your ears.
- Halasana Plow Pose
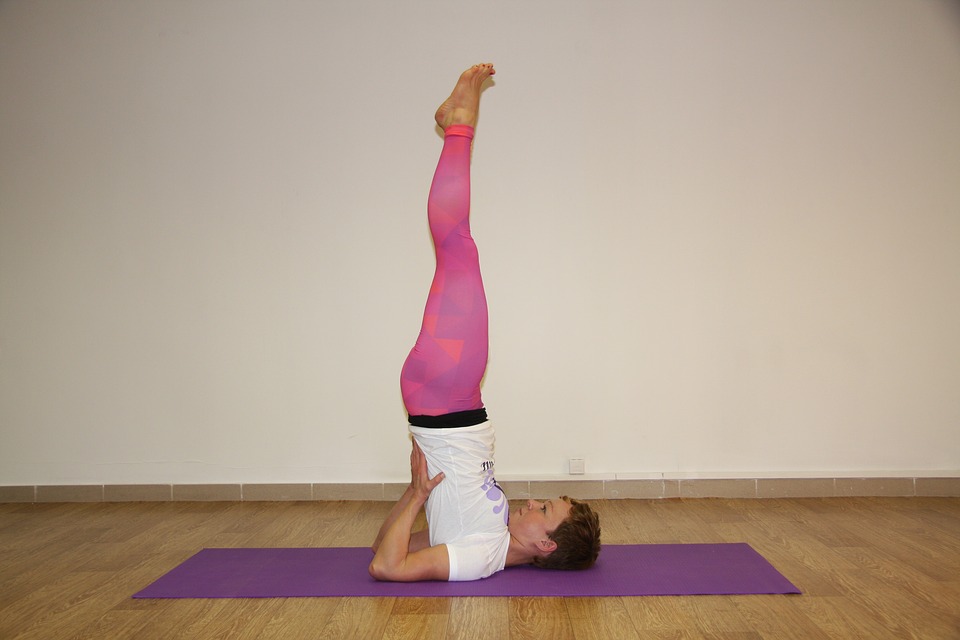
- Lie down flat on your back. If possible, use a yoga mat under your body to provide some cushion.
- Make sure your arms are extended next to your body, palms flat on the floor.
- Bring your knees in towards your nose, as close as possible to the body. Keep your palms flat on the floor or support your back by placing your hands at your hips.
- Extend your legs and continue bending at your hips. Try to touch the floor behind your head with your feet.
- Hold the pose with your legs straight. Try a variation as well by bending your knees and bringing them in towards your head until they are next to your ears. Hold this pose for 5-6 minutes.
- It is recommended that you keep your head and neck straight. Turning your neck during this pose can cause strain on the neck muscles.
- Trikonasana Triangle Pose
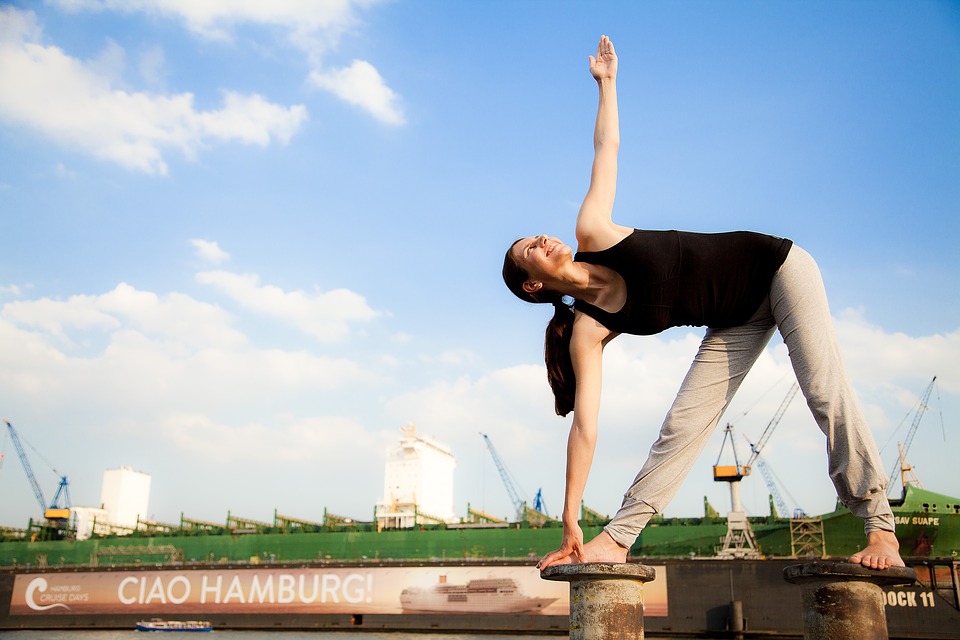
- Stand with your feet about 5 feet apart, arms and hands at your side, with your toes facing forward the same direction as your body.
- Turn your right foot 90 degrees.
- Reach up high with your right hand, then in an arcing motion pivot your body to follow your hand down to your right foot.
- Keep your feet planted and gently touch the ground next to the inside of your right foot with your hand. If you are unable to reach that far due to lack of flexibility, gently touch your right hand to your shin.
- Allow the left hand to reach towards the sky, palm facing forward.
- Feel the twist of your body at the hips as you continue to reach downward with the right hand and upward with your left hand, opening the hips, heart, and shoulders.
- Turn your head to look at the left hand that is up in the air, also opening the neck. Hold this pose for 2-3 minutes.
- Padangusthasana Big Toe Pose
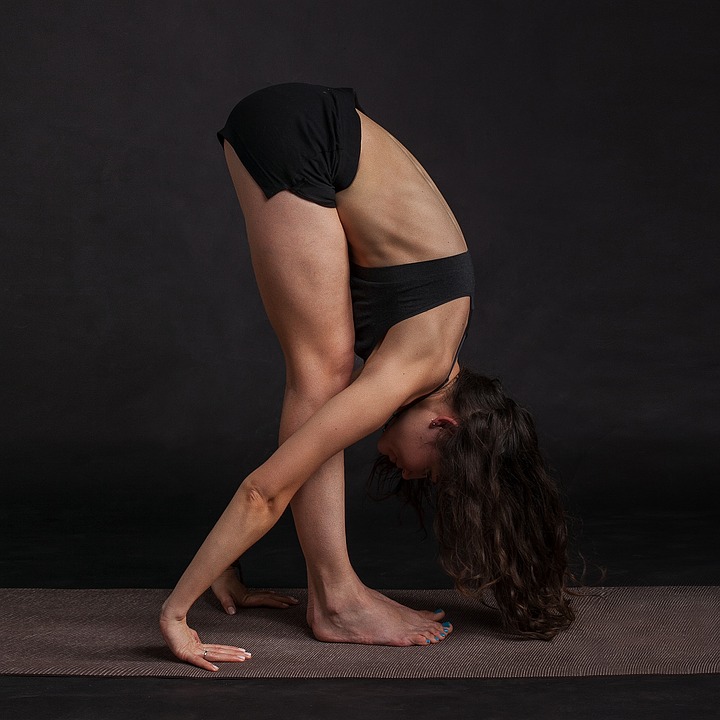
- Stand with your feet about 6 inches apart, toes facing forward.
- Raise your arms and reach towards the sky with your hands.
- Reach as high as you can and tilt your head slightly backwards.
- Keep your back completely flat and begin bringing your hands and arms downward. Allow your head to follow.
- As you arch downwards, bend at the hips until your hands reach the floor.
- Keep your knees slightly bent, feeling the stretch in your hamstrings.
- Slide the pointer and middle fingers of both hands between your big toe and the second toe on both feet.
- Wrap your fingers around the big toes and gently pull yourself for a deeper stretch.
- Allow your head and neck to gently dangle, releasing the tension by shaking your head no and nodding your head yes.
- Take your fingers out from under your toes and grab your hands onto opposite elbows.
- Continue to stretch your body by holding this position and developing a deeper, longer stretch. I recommend holding this stretch for 3-5 minutes when beginning yoga.
- Reach your arms straight out again to touch the floor, then stand up slowly by following your fingers in an arched motion until you are standing again with arms raised.
- Bring your arms back down to your sides.
- Matsyasana Fish Pose

- Lie down flat on your back using a yoga mat under your body.
- Bend your knees and place your feet flat on the floor. You can keep your feet on the floor with your knees bent throughout this pose or straighten the knees and rest your heels on the floor.
- Lift your pelvis and tuck your hands under your butt to provide some extra support.
- Press your elbows as close as possible to your body, still touching the floor.
- Push your elbows into the floor and into your body with more force and gently raise your chest and neck off the floor.
- Rest the crown of your head gently on the floor.
- Hold this pose for 30 seconds.
- Carefully lower your back until it is on the floor again.
- Bhujangasana Cobra Pose
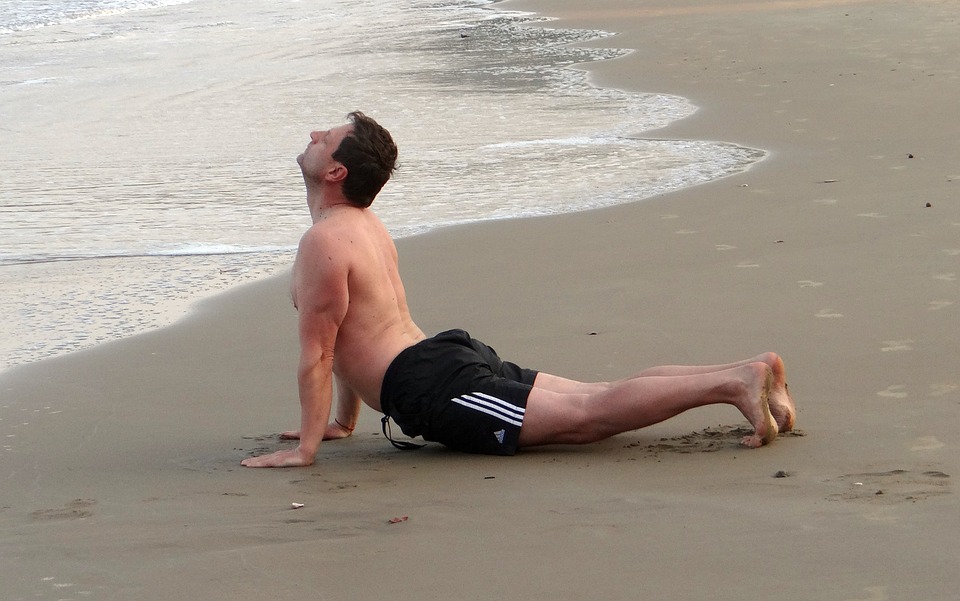
- Lie down on a yoga mat with your stomach on the ground and your arms and legs extended in opposite directions. The tops of your feet and your palms should be touching the ground.
- Bend your elbows, keeping them close to the body, and bring them so that your palms are on the ground, under your shoulders.
- Press the tops of the feet, thighs, and pelvis into the floor and raise your chest from the floor.
- Distribute the weight between the front of the thighs, the tops of the feet, and your hands.
- Lift your chest higher, curving your back until the chest is open to the sky.
- Keep your face forward but look with your eyes to the sky. This will open your chest but not force your neck to drink backwards.
- Hold this pose for 30 seconds.
- Gently lower yourself to the floor.
- Adho Mukha Svanasana Downward Dog Pose
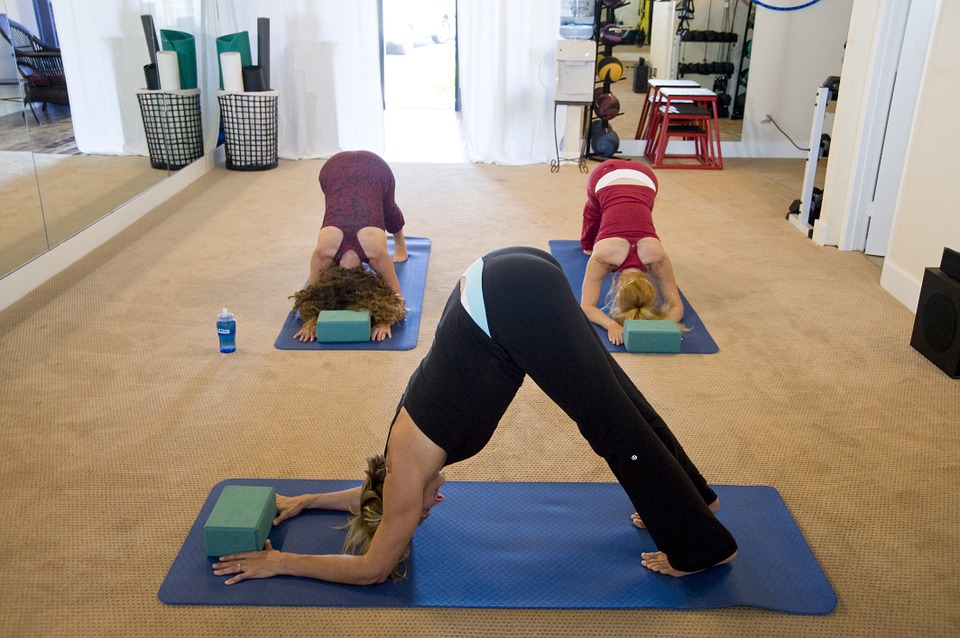
- Start by sitting on your knees and stretching your arms out in front of you, palms down on the floor.
- Press down into the floor with your palms, lengthening your shoulders, and spreading your knees wide. You should feel a stretch in your hips as well as you press them into the floor.
- Curl your toes under and push through your toes and your hands, straightening your knees.
- Your body should be in an upside down “V” position.
- Push through your hands, spreading your fingers.
- Push your heels down if you can, keeping your legs slightly bent, and stretching the shoulders out by elongating your arms.
- Lift your hips and pelvis as much as possible, pushing them towards one another to really push your stretch to the max. Hold this pose for 2-3 minutes.
- Ustrasana Camel Pose
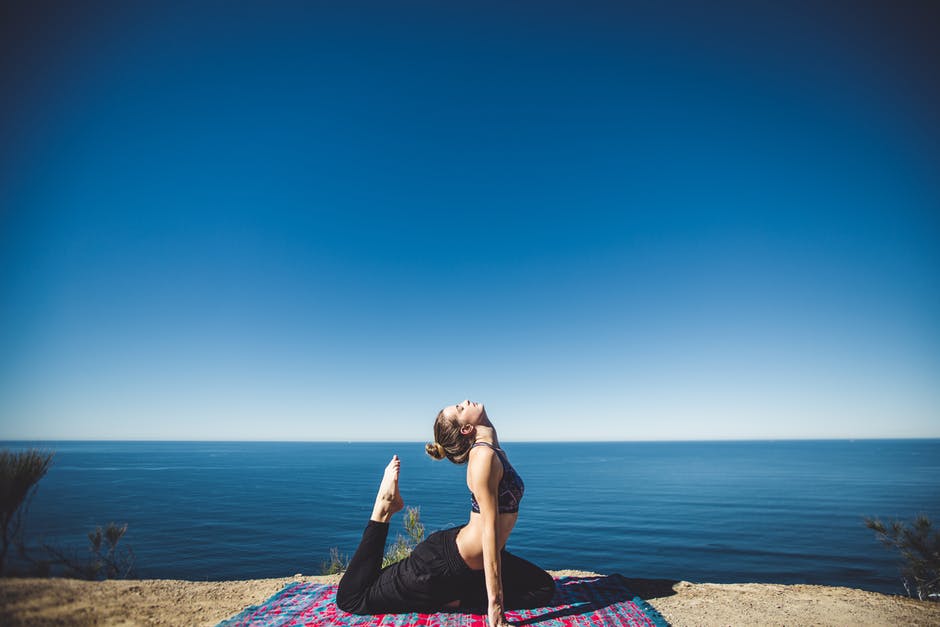
- Sit down with your legs tucked under your butt and your hands on the curve of your back for support.
- Push your pelvis forward, arching your back as much as possible.
- Place your hands on the heels of your feet.
- Gently lower your neck until it matches the arch created by your back, leaning your head slightly behind you.
- Carefully lift your head back up, straighten your back, and land your butt back on the heels of your feet. Try holding this pose for 30 seconds.


do you have a book with these poses? I am disabled and do not have fancy phone w everything. but I would like to try these poses.